

Showing posts with label Kids Crafts. Show all posts
Showing posts with label Kids Crafts. Show all posts
Saturday, February 28, 2015
Superhero Birthday Party, Take 2

Friday, January 2, 2015
LIttle Chefs Party
Shortly before Christmas, my firstborn celebrated his seventh birthday. I'm still kinda shell-shocked by it because I can still remember celebrating his first birthday as if it was yesterday and I'm not really sure where all the time has gone. Who knows whether or not he'll even want mommy to throw him corny birthday parties anymore in a few years? Every new year for him brings unknown waters and new territories; being the first child, he'll always be our parenting test subject.

Yes, that's PvZ on his apron... he's never played but his friends have! (Sorry for the bad picture... don't know what happened to the original picture, just took another one with my phone when I noticed today, Jan16/15)
Thursday, August 7, 2014
Elastic Bracelet Craze... Loom-less!
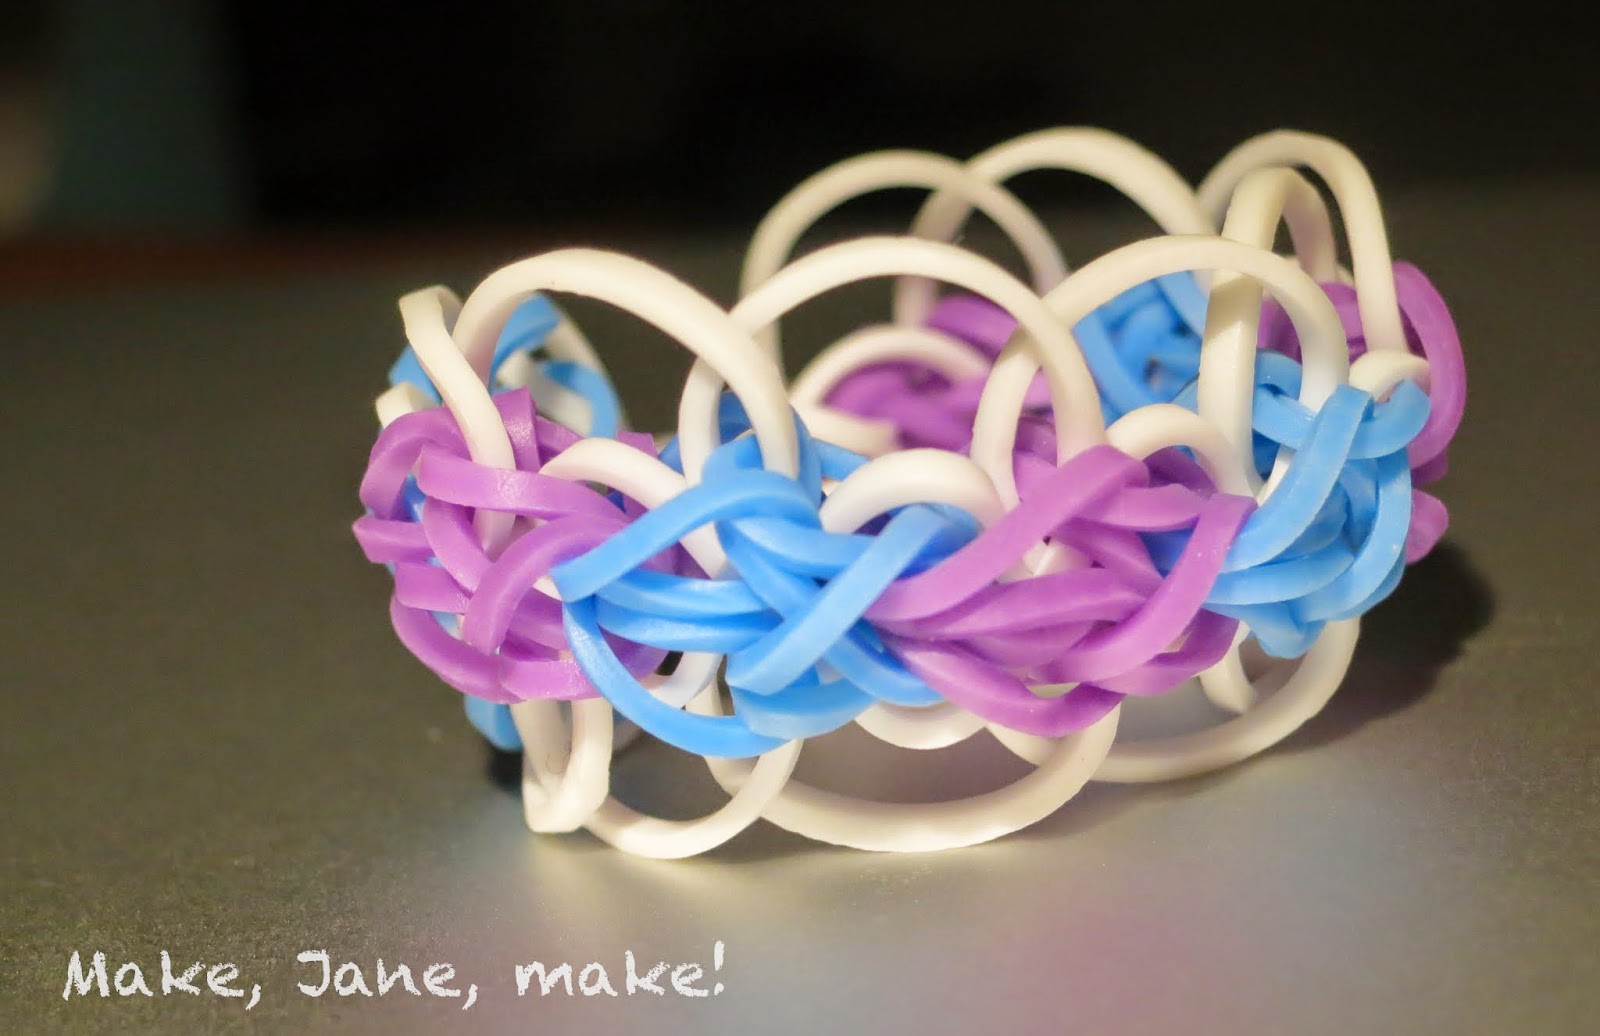
Diamond with Rings made with two forks, inspired by Loom Love
It all started with an innocent baggie of coloured rubber bands that I bought at the local discount grocer...

My eldest son has been enjoying YMCA camp this summer and has not been able to stop talking about all things camp, including his value bead bracelet. Understandably, the middle two siblings, who were already jealous that big brother was old enough for camp but they were not, began to resent not having bracelets of their own.

So when I saw the $1 baggie of coloured elastics hanging in the store, I figured that I could make them a simple elastic chain bracelet similar to the ones I used to play elastic jump ropes games with as a child. However, after we got them home I started to faintly remember another elastic weaving technique that was more like braiding from my grade school days... which I then had to google.

Some of my eldest son's first projects, fishtails and dragon-scale

What did I find? Well, as you may already know, there are a lot of tutorials out there to teach you how to make a Rainbow Loom bracelet without a loom. The crafter and DIY-er in me loved that. The simplicity and flexibility of a craft that could be done without elaborate equipment, other than the elastics of course, really appealed to me. And as I had already taught my kids how to finger knit (which they love), I also saw the potential to share another quiet and time-consuming craft with them (a.k.a. mommy's get out of jail free card).

His latest creation

Butterfly charm bracelet made on my fingers, inspired by Made by Mommy

Ridiculously small pink and red strawberry bracelet for my daughter

The collection... so far!

Tuesday, February 19, 2013
Reversible Superhero Cape How-to
I made some reversible superhero capes for my son's superhero-themed birthday party and let the kids decorate them with some iron-on felt letters and shapes. They turned out really cute and the kids loved them. Here are the capes that I made for my sons... these have the emblems sewn on so that they'll tolerate multiple (multiple) washes.


I know tutorials for superhero capes are available ad nauseum, but I took some pictures as I was sewing so [crazy, overtired mommy in her threatening tone] now you get to see them.
Wednesday, February 13, 2013
A Super Fifth Birthday!

Like some kind of clockwork child, my eldest son is now into superheroes.
His current favourite? Batman.
Why? "He has a cape and a mask and spiky things on his arms."
Ahh, accessories. Men love them too. Just in a different way. (For instance, my husband said he always wanted to be a hockey goalie because of the cool pads and gear... but that's a story for another day.) Today's story is about my son's super fifth birthday.
Saturday, June 16, 2012
Wednesday, April 25, 2012
Spring Planting with the Kids

Spring has sprung (minus the little hiccup that involved snow yesterday :P) and it's time to get planting for a new season. Last year, I started my seeds indoors much earlier in the spring and found that the seedlings were outgrowing their pots before the soil was warm enough to transplant them. So this year I waited until the warm weather seemed to settle in a bit more.

I've been saving eggshells for about a week or two to try them as seed pots. Beautiful repurpose and easy to plant... whoever thought of this first was a genius! I did buy some compostable seed pots because I wasn't sure how the larger plants (tomatoes, pumpkin, etc.) would fare in the little shells - but if they do well, it'll be all egg shells next year!

The kids had a ball filling up the eggshells and picking the seeds to go inside. I think they were tickled pink to be able to play with dirt inside the house! They chose all the seeds that came in the original packets with the piretty pictures and avoided my ghetto gathered and collected seeds from yesteryear's harvest :)

There were a few seeds that I've had on hand for more than a few years so I'm not sure that they will all germinate. In fact, I'm pretty sure that I'll be buying marigolds because those seeds looked pretty withered and spent.
Hubby has done a great job transforming our once empty backyard into liveable growing and playing space. It's still a work in progress with at least a few more years of projects, but things are really shaping up. It's a nice day today, so I'll see if I can't get a few pics to post when we go outside to play later.
Can't wait to start the garden!
Saturday, April 7, 2012
Mosaic Easter Eggs with Mod Podge

At Sew, Mama, Sew! they used Mod Podge Sparkle and much prettier and more coordinated fabric scraps than I did. However,when you're crafting with four and two year old boys... you don't worry about pretty.
My younger son tired of the craft as soon as he figured out that it was a sticky hands project (funny how all toddlers go through a no-"ticky" phase). My eldest son surprised me by sticking with the craft for a good half hour before eventually getting frustrated with his ever stickier and sticker fingers, which made it difficult for him to pick up and paste the small scraps onto the eggs. So as usual, mommy got to finish off what the children left behind.
It would have been nice to have cardboard or paper-mache eggs, since the plastic eggs were a bit slippery and had rough edges where the two halves separated... But since I went shopping for the eggs on Thursday - beggars can't be choosers.

All in all, it was a fun craft to try and we'll definitely do it again next year. I hid the finished eggs in the boys' room just now as they were sleeping. It will be their warm-up for the big Easter Egg hunt in the morning :)
Thursday, January 5, 2012
Fourth Birthday: Gingerbread Houses
What do you do with kindergarten age children during a birthday party? There's food and cake, but how to keep them occupied during the remainder of the party? Having winter birthdays means that my kids will never be able to have any outdoor fun, like sprinklers or jumping castles. And complicated crafting activities that require a lot of sitting still don't work that well for kindergarten kids... especially the boys.
So I figured I would combine something that involves food (in this case, candy and cookies), decorating (for the girls) and making a mess with icing (for the boys). And since it was something that was connected to the holiday season, I hoped that it would be something new and novel for the kids.

Gingerbread houses! What child would say no to candies and colours and icing "glue"?
I had originally whipped up a whole batch of gingerbread dough to bake the cookies myself, but when I went to Bulk Barn to pick up the candies, I found they had house kits that were very reasonably priced and saved me the trouble and sleeplessness of doing too much the night before the party.
I assembled the houses the morning of the party and hoped desperately that the icing would set hard enough in the two hours before the party to withstand the rigours of young children decorating them. To this end, I intentionally mixed the royal icing a little thicker than usual, which definitely helped the houses dry faster, but almost gave me carpal tunnel trying to squeeze it out of the icing bag!
Note to self: Assembling one or two gingerbread houses is fun, but assembling nine in a row under a time limit is not.
When the kids initially sat down to the dining room table for this craft, I wasn't sure that they understood or wanted to participate. However, once I had demonstrated and handed them each their own bag full of icing plus a table full of candies, they were off in their own little sugar-fuelled worlds.
Here are some of their creations:

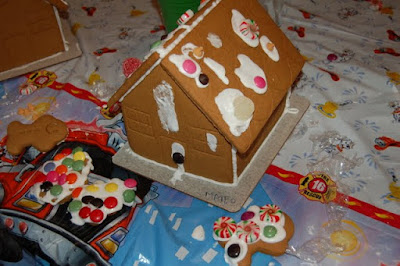

The last one belongs to my son, the birthday boy. He was complaining that the candies weren't sticking. And it was no wonder when I turned his house around to investigate and found the icing avalanche that was sliding down his roof. I just had to reassure him that the icing would dry soon and he just had to keep replacing the candies that were sliding off :)
They had lots of fun and the mess was more or less limited to fingertips and the tabletop... not much on clothing or hair. Luckily I had my SIL and a couple of moms here to help me clean up and wrap the houses up in cello paper. So the craft was a success and the kids enjoyed having something they made to show to their moms.
So I figured I would combine something that involves food (in this case, candy and cookies), decorating (for the girls) and making a mess with icing (for the boys). And since it was something that was connected to the holiday season, I hoped that it would be something new and novel for the kids.

Gingerbread houses! What child would say no to candies and colours and icing "glue"?
I had originally whipped up a whole batch of gingerbread dough to bake the cookies myself, but when I went to Bulk Barn to pick up the candies, I found they had house kits that were very reasonably priced and saved me the trouble and sleeplessness of doing too much the night before the party.
 |
| The miniature gingerbread suburb along with the spinosaurus cake. |
Note to self: Assembling one or two gingerbread houses is fun, but assembling nine in a row under a time limit is not.
When the kids initially sat down to the dining room table for this craft, I wasn't sure that they understood or wanted to participate. However, once I had demonstrated and handed them each their own bag full of icing plus a table full of candies, they were off in their own little sugar-fuelled worlds.
Here are some of their creations:

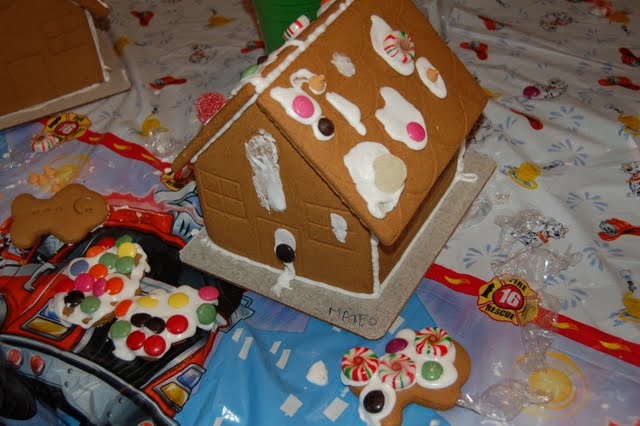

The last one belongs to my son, the birthday boy. He was complaining that the candies weren't sticking. And it was no wonder when I turned his house around to investigate and found the icing avalanche that was sliding down his roof. I just had to reassure him that the icing would dry soon and he just had to keep replacing the candies that were sliding off :)
They had lots of fun and the mess was more or less limited to fingertips and the tabletop... not much on clothing or hair. Luckily I had my SIL and a couple of moms here to help me clean up and wrap the houses up in cello paper. So the craft was a success and the kids enjoyed having something they made to show to their moms.
Friday, February 4, 2011
Felt Ornaments: Take-home craft for a Christmas baby's birthday
For my son's third birthday party, we made felt Christmas ornaments as a take-home craft. I pre-cut all the shapes (stars, trees, snowmen, reindeers, kugels, etc) and laid out felt shapes, sequins, ribbon, batting, popsicle sticks and glue on a disposable table cloth lined counter and let the kids at it.
Put the glue in these great paint cups that I got for under $6 at the local educational warehouse sale (even at their regular price of about $10, they are still a great deal for home crafts... anything to minimize the mess!) The kids had a lot of fun designing their own special Christmas keepsake. Lots of kids slopping glue all over their felt pieces and revelling in their independence.

I was really surprised at the ornament my son created because it was the first time I'd seen him create something that actually resembled the intended subject in both form and colour. It was also really cute because the reindeer specifically had to have a red nose. He also crafted the star which has kind of a retro, sixties feel to it.
I did make the mistake of not stuffing the ornaments beforehand. Silly me thought it would be easier for the kids to decorate flat ornaments as opposed to puffy pre-stuffed ornaments. Unfortunately, I completely forgot the short and often non-existent patience of small children. As soon as they put the final sticky, still-wet, gluey touch to their masterpieces, they wanted them stuffed and sewn shut for immediate play. So there was a little bit of bribery needed to get all the children to leave their creations with me to dry while they were sent off to clean up and play for a bit. Next time, the kids will definitely be decorating ready-to-go pieces. Or maybe I'll even run the felt through my sticker maker to make the craft glue-less?
Anyway, lots of fun was had by all.
Put the glue in these great paint cups that I got for under $6 at the local educational warehouse sale (even at their regular price of about $10, they are still a great deal for home crafts... anything to minimize the mess!) The kids had a lot of fun designing their own special Christmas keepsake. Lots of kids slopping glue all over their felt pieces and revelling in their independence.


I was really surprised at the ornament my son created because it was the first time I'd seen him create something that actually resembled the intended subject in both form and colour. It was also really cute because the reindeer specifically had to have a red nose. He also crafted the star which has kind of a retro, sixties feel to it.
I did make the mistake of not stuffing the ornaments beforehand. Silly me thought it would be easier for the kids to decorate flat ornaments as opposed to puffy pre-stuffed ornaments. Unfortunately, I completely forgot the short and often non-existent patience of small children. As soon as they put the final sticky, still-wet, gluey touch to their masterpieces, they wanted them stuffed and sewn shut for immediate play. So there was a little bit of bribery needed to get all the children to leave their creations with me to dry while they were sent off to clean up and play for a bit. Next time, the kids will definitely be decorating ready-to-go pieces. Or maybe I'll even run the felt through my sticker maker to make the craft glue-less?
Anyway, lots of fun was had by all.
Subscribe to:
Posts (Atom)