Printfriendly
Small Share
Showing posts with label Tutorial. Show all posts
Monday, December 15, 2014
DIY Halloween: The Cheshire Cat How-To, Part Two
You came back for more after my long-winded Part One? Thanks for the interest! The first part of this tutorial in which I go over how I modified an existing (free!) dinosaur costume into a cat body is here. And the original, unmodified costume pattern is available here.
The hood part of the costume is where I made the most changes. Nothing mind-blowing or super innovative. Just adding a lining so that details could be added onto the hood or, in the case of my modified Buddy the Dinosaur costume, teeth could be inserted into the mouth opening.
DIY Halloween: The Cheshire Cat How-To, Part One
I know it's almost Christmas, but better late than never... and when I say never, I really mean never. This post might be lost to the abyss of mommy-brain for-EVER. So without further ado, the final Down the Rabbit Hole Halloween post... part one.
So here's a two-part, how-to post on making a full body animal costume by modifying a great free costume available from PBS.org --> Buddy the Dinosaur Costume. The first part will be just dealing with the body and then I'll write a separate post for the head.
Friday, November 7, 2014
DIY Halloween: Simple and Quick Alice in Wonderland
Note to self: Never ever make promises that have dates or times attached to them. Like saying I'll be somewhere with my four chronologically-indifferent children at a specific time. Or saying that this post would be done a week ago. Or promising myself to start Halloween sewing earlier. The end result is always that I'm rushing up until the last minute and sometimes miss my deadline completely.
This year, I started out with a bang and high hopes. The fabric was bought and washed at the beginning of October, making an early Halloween costume debut entirely possible. But as my young children slowly become older children, I'm starting to get a taste of how chaotic scheduling and managing children's calendars can be. So between birthday parties and Chinese school and weddings and Thanksgiving, the costumes were just barely done in time for our annual photo shoot with friends.
Tuesday, July 29, 2014
Beach Towel Poncho-Pack, Revisited with a Tutorial!
A couple of years ago, I blogged about my first beach towel poncho-packs. Those original poncho-packs have since been to multiple swim lessons, splash pads and beaches and are still going strong. Of course there are now two additional people in our family, one of which has been requesting her own "backpack towel" since last summer. In addition to that, my older son started summer camp this year and he needs at least two sets of swim stuff so that I have time to wash the stinky, wet ones on alternate days. And as fate would have it, we were discussing the poncho-packs at the park a couple of weeks ago and one of my mommy friends asked for instructions on how to make her own. So here is a return visit to the beach towel poncho-packs, complete with photos and a tutorial.
p.s. This is a great scrap buster project. So never you mind if you notice that the pieces in my pictures are not quite the right measurements or seem a bit skewed. I am crazy about using up scraps, even if they are only barely big enough for my project.
p.p.s. In case you want to know, I used some scrap flannel pieces for this project. I think any soft and absorbent fabric would work great.
Wednesday, March 20, 2013
Baby Qipao Tutorial, Part 2
Had a brief intermission to wax nostalgic about my mom's cookie cutters and the era they hail from and now I'm back to part two of this qipao photo tutorial (you can find Part One here).
Wednesday, March 13, 2013
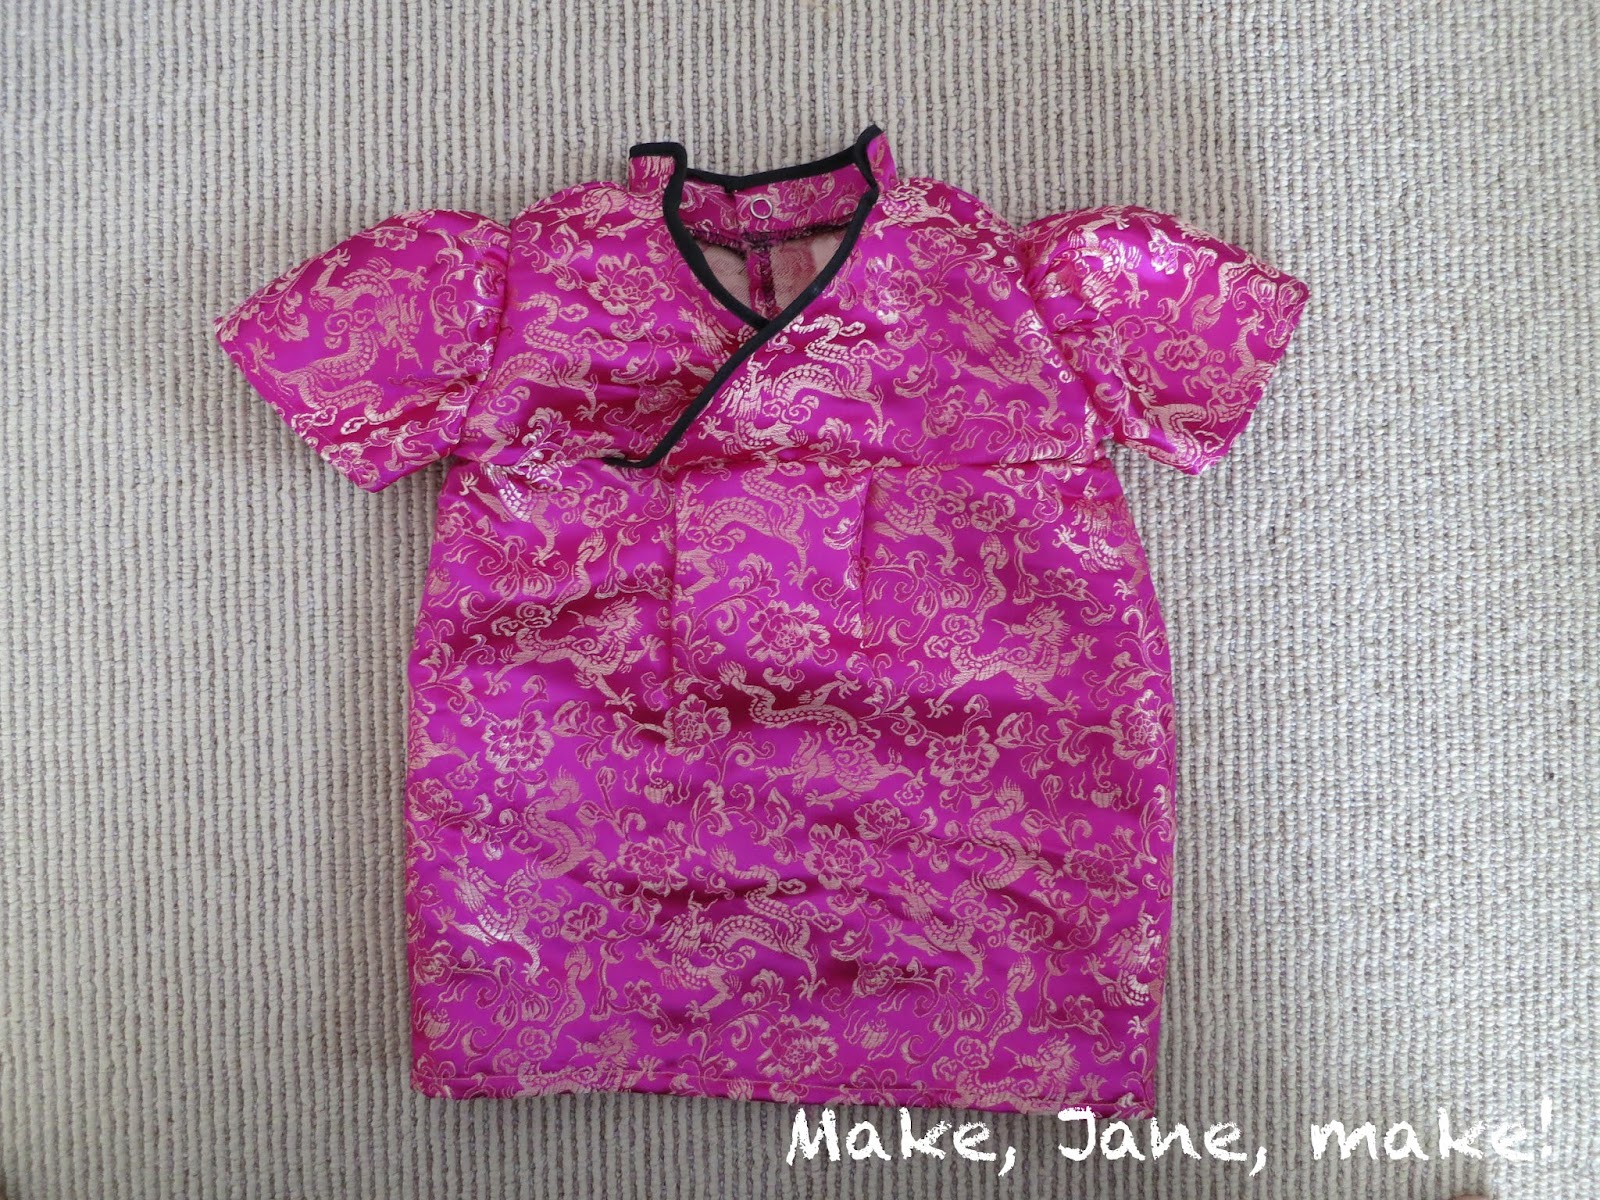
Baby Qipao Tutorial, Part One
I think I've said this before but I'll say it again... Sewing for girls is so much fun because I can make use of embellishments like puffed sleeves and ruffles and pleats and trim. Things that my boys probably would not appreciate on their camo-print clothes.
Last year I made a really small version of this baby qipao for my daughter which she had almost outgrown by the time I finished it. (Darn it, infants grow much too fast!) This year, I used the leftover fabric and reprised the pattern to make a version that was actually a little too large. Ahh, frazzled mommy can never get anything right.
Anyway, when I was Googling around for some design inspiration, I noticed that there is a lack of resources for sewing a simple Chinese style dress for a girl, so I thought I'd document the process and, because there are a lot of pictures, present it in two parts.
(Find Part Two here).
Last year I made a really small version of this baby qipao for my daughter which she had almost outgrown by the time I finished it. (Darn it, infants grow much too fast!) This year, I used the leftover fabric and reprised the pattern to make a version that was actually a little too large. Ahh, frazzled mommy can never get anything right.
Anyway, when I was Googling around for some design inspiration, I noticed that there is a lack of resources for sewing a simple Chinese style dress for a girl, so I thought I'd document the process and, because there are a lot of pictures, present it in two parts.
(Find Part Two here).
Saturday, February 23, 2013
Sweet Soup Dumplings (湯圓)
Mmmm... sweet soup dumplings. Chewy and warm and not too sweet. In our family we usually enjoy these around the winter solstice, but I know that a lot of families enjoy them during the new year and specifically to celebrate first full moon of Chinese New Year.
Usually, I make these every year with my father and sometimes my brothers if they are available. I have such fond memories of sitting around the dinner table with my family and making dumplings, pot stickers, spring rolls, etc. This year was extra special because it was the first time I made them with my family.
Tuesday, February 19, 2013
Reversible Superhero Cape How-to
I made some reversible superhero capes for my son's superhero-themed birthday party and let the kids decorate them with some iron-on felt letters and shapes. They turned out really cute and the kids loved them. Here are the capes that I made for my sons... these have the emblems sewn on so that they'll tolerate multiple (multiple) washes.
I know tutorials for superhero capes are available ad nauseum, but I took some pictures as I was sewing so [crazy, overtired mommy in her threatening tone] now you get to see them.
Monday, December 10, 2012
Kids Pants with Flat Seams
Wow, I've been pretty negligent with my blog posting lately. Do I have any excuses? Not really. Have I been up to anything interesting or time-consuming? Possibly, but probably not. So what have I done? Coloured/crafted/read/played with the kids, did some (...okay, very little... actually, not even close to enough) Christmas baking, obsessed over my son's upcoming birthday party and tried to get the house ready for the holidays. What I really need to do is kickstart some sewing activity since I have quite a few projects planned. So here's a post about pants to get myself into the sewing mood...
Tuesday, November 20, 2012
First Birthday Aster Headband
Tuesday, October 30, 2012
DIY Hallowe'en: The Fit for a Queen Top
I can't believe I finished the kids' costumes early enough this year to make something for myself. It helped that my costume took less than two hours to put together (including drafting!) and I was able to put it together along with DH's crown (the only thing he would consent to wearing) on the morning before our planned pumpkin patch outing. Actually this post took longer to write than the costume construction... although that's partly because we ran out of 8.5 x 11 paper for me to draw the template on [palm-forehead].
I'm going to include a tutorial and my pattern with a few notes:
- I am about 5'7" and usually a size 10 for dresses and a size L for shirts at Old Navy/Gap/Banana Republic.
- I am wearing a white, v-neck shirt underneath.
- I used crushed velvet (very stretchy), so I basically cut and sized without any darts or other things that you may need if you choose a fabric with no stretch to it.
- I didn't put a huge bell bottom on my sleeves for convenience' sake, but if this top had been for an adult masquerade party (i.e. no squirmy babes in arms) then I would definitely have made the sleeves more elaborate.
- Another modification that would also have worked for the sleeves would be to have fitted forearms/cuffs and a big puffed shoulder/upper arm.
So without further ado....
Tuesday, October 23, 2012
Hallowe'en 2012: Royalty Costume Round-up
This year's jumping off point for Hallowe'en was knights and princes(ses). And after much waiting for better weather and lighting, I finally have some decent pictures of the costumes in action.
Saturday, October 20, 2012
DIY Hallowe'en: Princess of the Autumnal Forests & Bonus Tutorial
I still remember a time when being a princess didn't entail having a specific name, hair colour, dress and prince. Being a princess simply meant that you dressed beautifully, behaved elegantly, wore a crown and bossed your little brothers around :) Whenever I wanted to be a princess, I just wore my twirliest dress and taped a zig-zaggity piece of paper into a circle around my head. Now with my own brood yearning to recreate ye ol' ladies and knights of yore, I knew it was the perfect opportunity to bring back the old-fashioned princess costume. So here's a super easy princess costume for any little girl whose mommy feels a little nauseated and disturbed by the Disney Princess franchise.
DIY Hallowe'en: The Felt Princess Headband Tutorial
Baby headbands are too cute, aren't they? I used to think they were more or less ornamental, or at the best, they simply served to distinguish a girl baby from a boy baby. However, now I have a baby with fine, sparse hair that is growing long and scraggly, but not growing thick enough to be held back by any hair clip, and I am beginning to understand that hairbands may serve a purpose.
So scratch using a tiara for her Hallowe'en costume because it would not have any hair to be clipped onto. And ditto for the classic circular crown because her crown definitely needs some kind of elastic to keep it anchored on her constantly moving head. The only headgear left is the venerable head/hairband.
This one was particularly easy to pull together because it consists of only three pieces and some fancy cutting.
Thursday, October 18, 2012
DIY Hallowe'en: Knight's Costume/Tunic Tutorial
Monday, October 15, 2012
DIY Hallowe'en: Felt and Cardboard Knights' Shields Tutorial
My sons have requested to be a knight and a prince-knight for Hallowe'en this year. You can't have a knight without a sword and a shield. This one is pretty straightforward to make, especially if you've already made the felt sword with the replaceable insert.
Saturday, October 13, 2012
DIY Hallowe'en: Felt and Cardboard Sword Tutorial
The cardboard sword. A staple of every boy's childhood. Easy, cheap, not very durable. Here's my shot at making the cardboard sword a bit more tolerant of the bumps and bruises of childhood fencing.
We've tried heavy corrugated cardboard, thick wrapping paper rolls, doubling up and taping down - but nothing has ever solved the inevitable bending and breaking of our many cardboard swords. So I began thinking about making a sword out of an etsy-staple... felt.
Of course it would still need some kind of reinforcement and thus the felt sword with a replaceable cardboard insert was born. Here's the tutorial:
Tuesday, July 17, 2012
Beach Towel Poncho-Pack
(2014/10: Check out my updated tutorial here!)
Summer has definitely arrived and the meteorologists on t.v. keep telling me that we are in a heat wave here in Southern Ontario. We are very lucky to have a splash pad just at the end of the street and it's been a godsend when the kids have wanted to play outside. But since my kids are still young, they often rely on mommy for many things; and getting ready for waterplay is definitely a multi-step, multi-accessory activity that they need help with.
Sunday, April 8, 2012
Eggstatic about Easter Headband
It's a beautiful Easter weekend and I wanted to make something bright and sunny to cheer up my baby girl's outfits. So voila! The Eggstatic about Easter headband! My inspiration was this pretty pleated headband from Jess @ Craftiness is not Optional.
This was a super simple craft which is great because I didn't want to spend too much time making something that will get two or three wears at most before the weekend is over. First pick some coordinating felt (yea! using up felt scraps!) and cut out some eggs of various sizes. I find that pastel colours best convey the Easter egg feel.
I "decorated" my eggs for Easter. The large white eggs have a zig zag detail (ricrac would be great here, unfortunately I only had burgundy coloured ricrac and ruddy red ricrac just doesn't say Easter). The zig zags are cut from yellow felt using my pinking shears and sewn onto the white eggs.
The light blue eggs have a polkadot design that was made by using a screw punch randomly over the surface of the eggs. And the pink eggs have a simple heart cut out.
Originally I was going to sew the eggs to fabric tube and thread a wide elastic through the tube to form the headband. However, with all the see-through parts on my eggs, I found that I needed a headband with a bit of panache since it peeked through the eggs.
The only thing I had lying around the house that fit the bill was this hot pink ribbon. So I pinned and sewed the eggs to the ribbon and then attached a bit of elastic to the ribbon to complete the band. And here is my mini model in her Easter outfit:
| Eggstatic about Easter Headband in action. |
Wednesday, January 18, 2012
Felt Play Food: T-Bone Steak
What else goes with felt fried eggs? A steak, of course!
I used an overcasting stitch to attach the marrow (red) to the bone (white) to give it a rough edge between marrow and bone and a running stitch to attach the bone (white) to the meat (dark red) to keep the edge of the bone sharp.
The t-bone steak was a big hit with the various adults who play with my kids. They all wanted my eldest to prepare his famous 8-Minute Steak (his own invention). The 8-Minute Steak is prepared by nuking the steak for 8 minutes... lol. My hubby was appalled and tried to teach him to sear the steak and then finish it in the oven, but my son insisted that his microwaved steak was superior. And my hubby wonders why I want to get rid of the microwave once the kids get older :)
I used an overcasting stitch to attach the marrow (red) to the bone (white) to give it a rough edge between marrow and bone and a running stitch to attach the bone (white) to the meat (dark red) to keep the edge of the bone sharp.
The t-bone steak was a big hit with the various adults who play with my kids. They all wanted my eldest to prepare his famous 8-Minute Steak (his own invention). The 8-Minute Steak is prepared by nuking the steak for 8 minutes... lol. My hubby was appalled and tried to teach him to sear the steak and then finish it in the oven, but my son insisted that his microwaved steak was superior. And my hubby wonders why I want to get rid of the microwave once the kids get older :)
Subscribe to:
Posts (Atom)