Make, Jane, make!

Printfriendly

Small Share

Friday, April 22, 2011

Fabric Buckets 2: Egg Baskets for the Boys

Tomorrow is the big egg hunt. Hopefully the weather dries up by tomorrow morning, since right now I can hear a pitter patter on our windows.

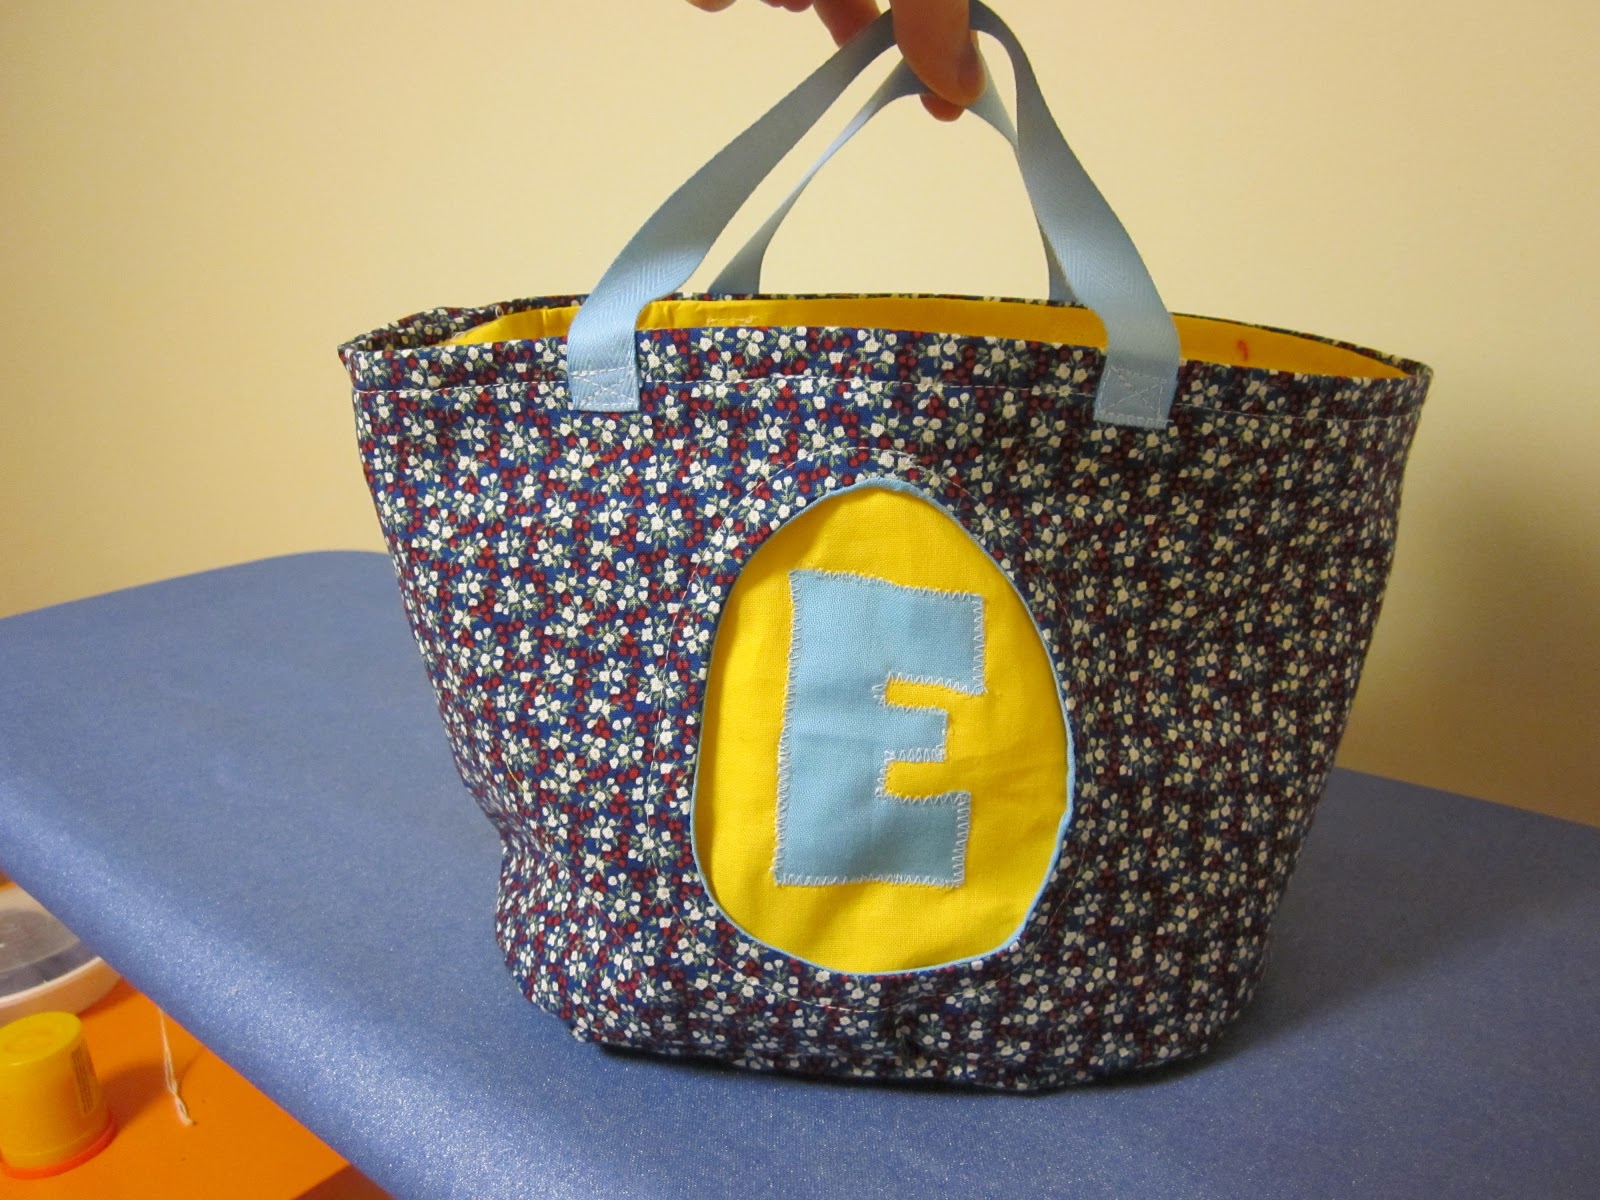
I like the idea of fabric egg baskets because they are unbreakable and reusable. Even though your local dollar store will have any number of super cute baskets for quick sale, nothing says "mommy loves you and wants to torture you by making you use her homemade crap" than a monogrammed egg basket.


I know that the colours are not the best match and I could've chosen a more seasonal print, but this is what happens to mommy's own children after she buys special fabrics to make gifts for other kids - mommy's kids get crazily patterned, funkily mismatched franken-projects made from the scraps :)

I used the same basic tutorial from RicRac that I blogged about earlier in my post, "Fabric Buckets for a Baby Boy". I just changed the dimensions so that my resulting baskets would be larger with an oval  (rather than circular) base.

First, I decided how large I wanted the base to be and cut that out of the last bits of quilted batting I had left in my scrap pile. (You'll also need to replicate this shape onto your outer fabric and lining fabric.)

I chose to only use batting in the base for stability. I opted for interfacing only for the sides of the basket to make them more flexible and lightweight.

Then I measured around the circumference of the base to determine how long the strip of fabric that wraps around the base (to form the sides of the basket) should be.


Added an inch for seam allowance and cut a strip of fabric that was 28 inches long and 8 inches tall.  I also cut the same strip from my lining fabric and some medium weight interfacing. (I would have used heavy weight if I'd had any, but the interfacing pickings are getting slim in my stash.)

These strips are actually twice the height because I was preparing to make two identical baskets.
Also wanted to add a cut-window with my boys' initials. So after ironing on the interfacing, I marked a egg shaped window onto the back of my interfaced flower (outer) fabric 8 inches in from one of the short edges. I cut out a slightly larger yellow egg (to be seen inside the window) and a slightly larger blue egg (to line the window).


Sewed the blue egg onto my window, right sides facing, using the pencilled on egg shape as my stitching guide.


Cut out the window leaving a small seam allowance and clipped all around the seam allowance.


Turned over to the other side and pulled the blue lining fabric through the window and ironed it all down.


Cut out one son's initial and appliqued it onto the yellow egg.


Placed the yellow egg in my open window and sewed it in.


From here on out you would basically follow the instructions from the RicRac tutorial, or if you've ever made a lined bag before you could probably just go on by instinct.


This is one of the few times you'll catch me pinning. I'm notorious for short cuts, and pinning and unpinning is definitely a corner I cut often... except when easing in curved seams. Learned the hard way that this is one short cut you should not take!


And for those who wonder about sewing that death trap of pins. It IS as awkward as it looks, although today's buckets were made a lot easier by virtue of their large size and longer curves.

Here is the lining and outer bucket both individually sewn up (except for a small turning hole in the lining layer, more on that next). Minimally pinned and ready to be attached together.


All attached and ready to be turned the right-way-out through my little hole. Just have to reach in the hole and grab hold of the outer bag...


... start pulling...


And voila! Your bucket is revealed!
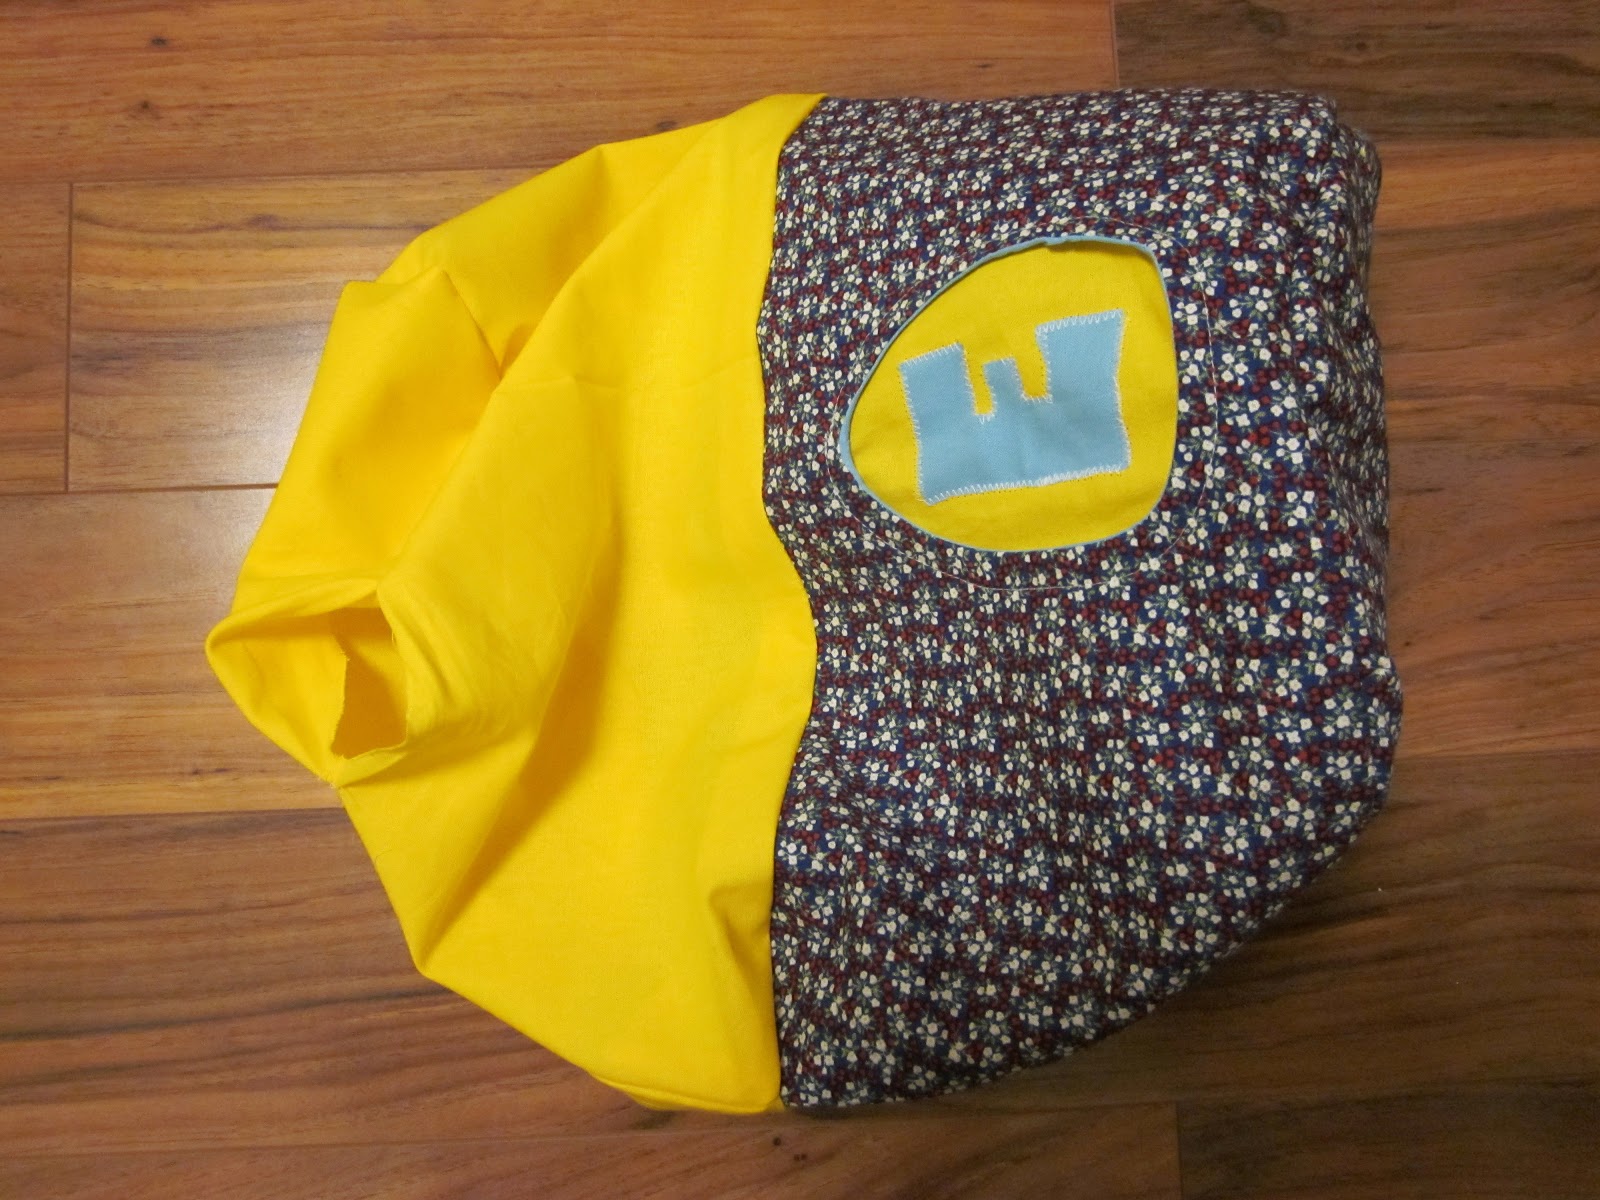

Hand or machine sew shut that turning hole. (Machine sewn, of course for lazy me!) Tuck the lining in, iron it down, and sew around the top edge to keep it all in place. Then add some handles and the kids are ready for the mad-grab!
Tuesday, April 19, 2011

Chinese Scallion (Green Onion) Pancakes

I crave this simple green onion pancake every once in a while and although they are easily obtainable at many Chinese restaurants and found in the frozen section of a lot of Chinese grocery stores, sometimes I want them when I want them :)


They are a fun morning or afternoon project that results in a freshly fried snack. What more needs to be said? They are also a great way to use up a bunch of scallions that you may have forgotten about in the back of the fridge.

~*^*~*^*~*^*~*^*~*^*~*^*~*^*~*^*~*^*~*^*~*^*~

Scallion Pancakes (Yield: approx 8 large or 12 medium pancakes)

3 cups flour (white or a mix of whole wheat and white)
about 1 cup boiling water
1 bunch scallions, chopped
2 tsp salt
1/2 tsp white pepper
sesame oil


Place the flour into a large bowl and, while stirring, slowly add the boiling water.

If, like me, you add too much and the dough gets a little too wet like this....


... just add a little more flour. You want the dough to come together and be soft enough to knead, but not so soft that it sticks to everything.

Knead it until it starts looking nice and uniform.


And when it's ready, pop it into a bowl and cover it with a damp, clean cloth to rest for about a half hour. This will relax the dough and make it a little less elastic-y and a little easier to roll out.

While the dough is resting, chop up your onions. I like to slice the whites of the onions vertically before chopping to reduce the amount of rolling and flying about that those little onion pieces do.


Place them into a bowl and combine with your salt and pepper. Mix it around and set aside until your dough is ready.


Get some sesame oil into a bowl with a small spoon or a brush for spreading.

Not the best or tastiest brand of sesame oil... but beggars can't be choosers when they're shopping at No Frills.

When you're ready to roll :) - flour your work surface liberally (because it's likely to get quite sticky with the oil and onions popping out everywhere) and pinch off a piece of dough. If you want to be really exact then you can roll your dough into a long cylinder and cut the cylinder up into 8 to 12 evenly sized pieces. Roll out your little piece of dough into a large thin circle and spread on some sesame oil.


Sprinkle a spoonful of onions over the surface and spread them around.


Roll up your pancake, like a scroll.


Pinch the ends of the tube closed (in a vain attempt to keep the oil and onions inside) and give the whole tube a quick squeeze along its length to seal the edges.


Now roll your tube up like a snail and tuck the ends under.


Flatten down your snail a bit with the palm of your hand and roll it out into a thin or thick pancake. The thinner your pancake and the hotter your pan, the more flaky and airy your pancakes will be. A thicker pancake gives you a crispy outer shell with some flakiness and a softer, chewier inside (kinda like the bottom crust of an apple pie).


And that's how you get all those layers of pancake and onion in such a small thin package. btw, I've never been able to roll out my pancakes without some bursting of seams and subsequent mess making. Which is why I usually roll these out on a cutting board - easier clean-up.

Fry them up in a hot pan with a bit of oil or dip them in some beaten egg before frying. Eat them plain or with some chili, soy, vinegar dipping sauce. Or put them in the freezer and fry them from frozen when you feel like a snack.

These were thicker pancakes which results in a denser, chewier pancake.

Hope you try making these from scratch sometime and tell me how it goes!

Saturday, April 16, 2011

Sewing a Bag

I remember my very first home-ec sewing project, it was a simple pillowcase/cloth bag with a drawstring closure.

Yes, I chose this fabric willingly... it was not forced upon me in any way.

Check out how large the drawstring casing is! Those home-ec teachers were definitely making sure we would be able to slide the drawstring through. 


And the first project that got me back into sewing full swing? Also a bag - a diaper bag big enough for cloth diapers, extra clothes and supplies for daycare.


Since then I've made many more bags and purses, including my current diaper bag which I am embarrassed to post a picture of because it is so large that I may as well be carrying my children around in it!

Sewing a bag can be as simple or as complicated as you want to make it and I think it's a great first project because the end result is immediately useful. Here's my half-an-hour, made-from-scraps, impromptu Easter egg basket for my son's first hunt.


There are so many great free tutorials out there too. Here are, respectively, the Detour Diaper bag from MakeBabyStuff.com and the Buttercup Bag from made-by-rae.com shrunk down and made in miniature as play purses for little girls.


Detour Diaper bag from MakeBabyStuff.com

Buttercup Bag from made-by-rae.com (finished with a magnetic snap and minus button embellishment)

And here's my son's playschool backpack, modified from this Back to School Robot Messenger Bag pattern on CranstonVillage.com.

Added an inner zipper closure because what child's backpack can be expected to hold its contents in with only a fold-over velcro flap?

The envy of all his male classmates.

I also learned about many useful aspects of sewing while making my various bags, like pockets, zippers, interfacing and linings. If you think that this may be a good first sewing project for you then check out the above tutorials or this super cool website: http://u-handbag.typepad.com/ which is chock full of useful tips and patterns. Or just surf around - people are super generous with their insights and projects, and chances are you'll find something to fit your bill.


Friday, April 8, 2011

Simple Pleasures: A la mode


I haven't really been keeping up with this blog lately, but then again I haven't been doing much to blog about. Been feeling kinda sick these past few weeks and my usual after-baby's-in-bed activity now consists of crawling up to my bed and trying to cocoon away in a darkened bedroom. Alas, my mind keeps on going and thinking of all the pretty first birthday dresses I could be making for little friends or lovely treats I could be baking up or even simply folding up the weekend's laundry.

So today, I vowed to grin and bear it and do something productive. Unfortunately for our bedroom floor the task I chose was not to sort underwear and fold shirts. Instead I decided to satisfy a two week long craving for apple pie. This craving began at the supermarket when I noticed ice cream on sale... normally we make our own, but who am I kidding? My stomach is barely allowing me to prepare dinner somedays, much less stir up some custard afterwards. So I bought some vanilla ice cream which then begged the question, how should we enjoy it?

My absolute first thought was fresh from the oven apple pie, but not having the time to make it that day we settled with Chocolate Peanut Butter Fudge Sundae Sauce from Nigella.com which made the perfect amount for three consecutive days of warm saucy bliss. Still, it wasn't apple pie... so today the inevitable happened - pie was made, melting ice cream ensued.


Friday, April 1, 2011

Textural Goodness: Stir Fried Nian Gao with Napa Cabbage

There may have been a napa cabbage shortage in Korea in the fall, but there's definitely no shortage of cheap napa cabbage here. Yesterday, I looked into the fridge and pondered about what I wanted to make with the rest of a huge head of napa cabbage. We'd used part of it for hot pot earlier, and another part of it in a stir fry, but it was just too massive... Then I remembered this dish:


There is a phrase in Chinese which refers to the texture of foods, 口感 (link to a site that will allow you to hear this phrase pronounced in Mandarin and Cantonese). And there are many Chinese dishes that are purely about enjoyment of textures - nian gao (or neen gow) is definitely one of those dishes. I've blogged before about the sweet version of this rice cake in my CNY cooking post, but this post is an ode to the savoury side of nian gow.

Savoury nian gow is made from non-glutinous rice and can be enjoyed in almost any dish where you would like to add some chewy goodness. I love it added to hot pot as a carb component or stir fried with veggies and meat to form a quick one dish meal.


Stir Fried Nian Gao with Napa Cabbage Yield: dinner for two + two small children with some leftovers 
1/2 - 2/3 lb pork, thinly shredded or ground
6 - 8 leaves napa cabbage, cut into medium pieces
4 ounces button mushrooms, sliced
2 - 3 cloves garlic, minced
1 lb nian gao, sliced into thin discs/separated
1 Tbsp cornstarch
soy sauce
oyster sauce

Marinate the pork in cornstarch and about 2 teaspoonfuls of soy sauce. Let it sit while you prepare the other ingredients.


Chop up your cabbage, mushrooms and garlic.


Check the nian gao you bought to see what kind of preparation is needed. Nian gao is usually found in the refrigerated section with fresh noodles and the soup meatballs. The supermarket I went to had this type and the long rod-shaped ones (which are better for soup/hot pot). This kind was pretty convenient since it was actually pre-scored into small thin rectangles which cooked really easily right in the wok. Although I kinda like thicker, chewier pieces - so if I can't find the thicker discs next time, I may cut up the rods myself to get even thicker, chewier slices of nian gao. If you are using thick slices of nian gao or really dry nian gao you may want to consider soaking them first in some warm water to soften them up.


Heat up your wok to medium-high, add some oil and throw your pork in. Cook until almost all traces of pink are gone. Don't worry about brown bits sticking everywhere as you cook. The veggies contain so much moisture, they will basically deglaze your pan for you later.


Toss in the cabbage, mushrooms and garlic. You could definitely also have green onions, julienned carrots, enoki mushrooms, king oyster mushrooms or whatever else you like. This is just what I had on hand. A lot of people will use Chinese mushrooms instead of button mushrooms, but I didn't want the nian gao to have any rivals in the texture arena of this dish.


While I waited for the mushrooms and napa cabbage to wilt and release most of their moisture. I separated my nian gao into its tiny slices.


Once the cabbage and mushrooms are basically cooked through to your liking. Add the nian gao and lower the heat to medium (if your burner is super hot like mine :)


At this point, you can add soy sauce and oyster sauce to taste. I probably added about 2 teaspoonfuls more soy and 2-3 tablespoonfuls of oyster sauce. It really depends on your taste and the types and brands of sauces you're using.


Whatever you do, keep turning and flipping the wok contents! Do not stop and try to take pictures of yourself adding oyster sauce! Because as you do, the nian gao starts to soften and, like any rice product, will start to stick. I had a few sticky spots form as I tried to get this picture... but usually if you keep stirring periodically, you should have no problem. Whenever the nian gao is soft enough and the flavouring is to your liking, the dish is ready!


Quick one dish meal for a lazy day dinner.